

The PyxMagic Hub offers tools to edit your images, including mask clean up, adjusting lighting and adding style elements like backgrounds and shadows. Here’s a quick overview of the PyxMagic editor:
The editor is available by logging into the PyxMagic Hub (note: editing capabilities are only available via the hub, not on the PyxMagic app). Once you select the image you want to edit, the editing workflow is displayed in six steps at the top of the screen. Each step has its own set of controls on the right panel. Follow the workflow from left to right and use the tools from top to bottom. You can navigate to any step at any point during the workflow.
Masking
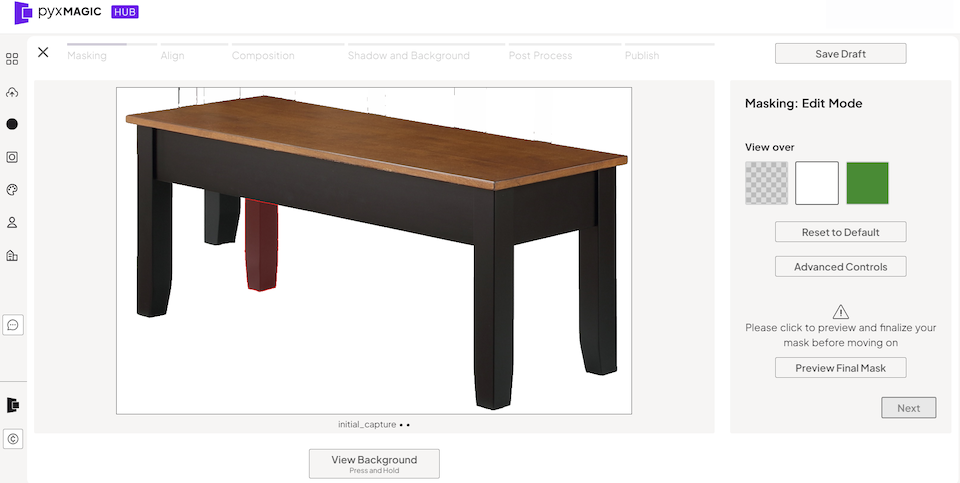
- Edit Mask: Tap “Edit Mask” if any area needs adjustment.
- Zoom and Pan: Zoom in/out and pan by holding the space key and using the mouse to drag.
- Remove Segments: Select and click to remove chunks not part of the product. If unsure, press and hold “View Background” to see the original raw capture. Leftover strings of pixels will disappear when you click ‘Preview Final Mask.’
- Fine Mask Area: Click to generate smaller chunks for finer adjustments.
- Advanced Controls: Click and drag to add or remove multiple segments, or use the brush tool to add or remove content within a specific segment. Apply the freeform brush to make adjustments anywhere on the canvas.
- Preview Final Mask: Tap “Preview Final Mask” to see the refined mask.
- Additional Adjustments: If needed, click to remove persistent issues.
- Finalize: Tap “Preview Final Mask” again to finalize your mask.
Alignment

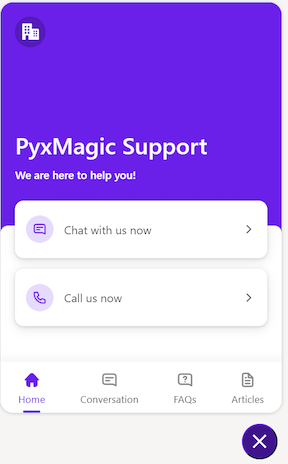
Adjust image rotation and correct vertical and horizontal alignment to fix skewed or rotated products due to different capture angles. Remember that you can reach a live support agent if you have any questions by clicking the ‘Chat’ button.
Composition
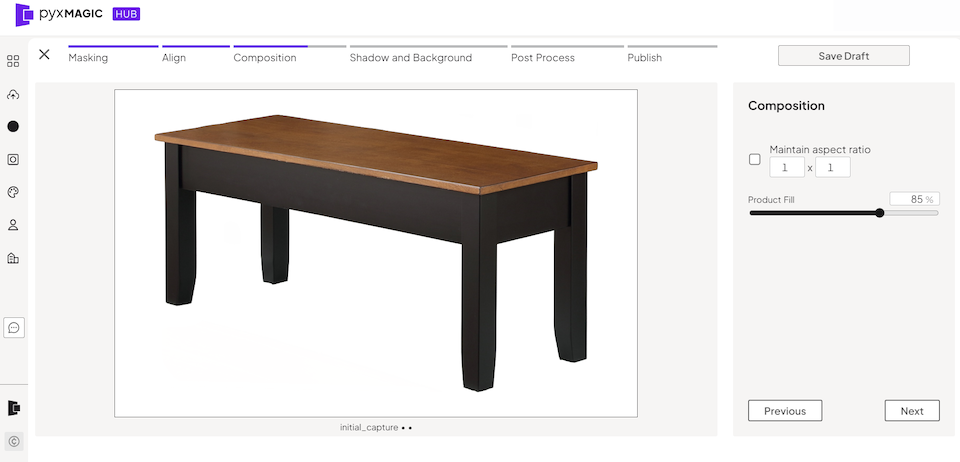
Adjust the frame fill and aspect ratio; by default, the aspect ratio matches the original capture, and the frame fill is set to 85%. Adjust these settings to your liking by entering your desired values.
Shadows
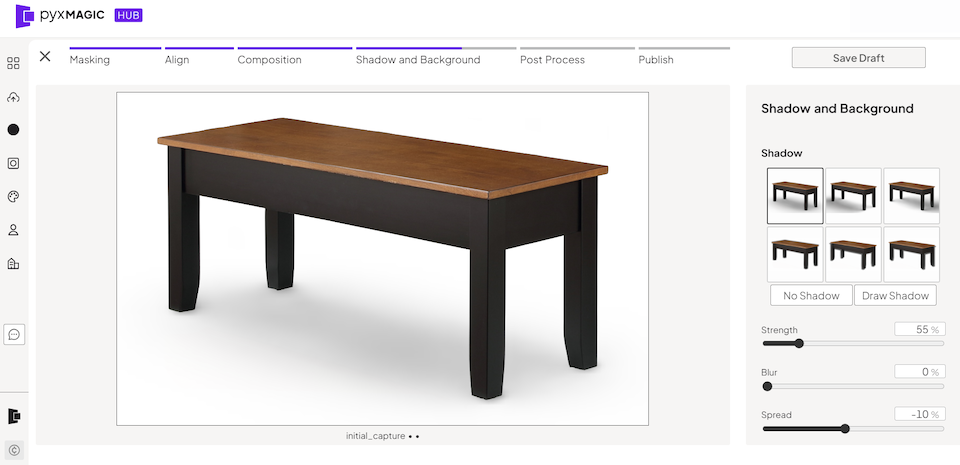
- Shadow Order: The first column shows drop shadows, the middle column shows left shadows, and the third column shows right shadows. The bottom row are shadows for wall-mounted products like clocks or paintings.
- Shadow Sliders: Adjust the darkness of the shadow with ‘Strength,’ the edge with ‘Blur,’ and the size with ‘Spread.’
- Custom Shadows: If you prefer not to use an AI-generated shadow, click ‘Custom’ to draw a custom shadow using a polygon tool, then adjust the strength and blur with the sliders.
Post Process:
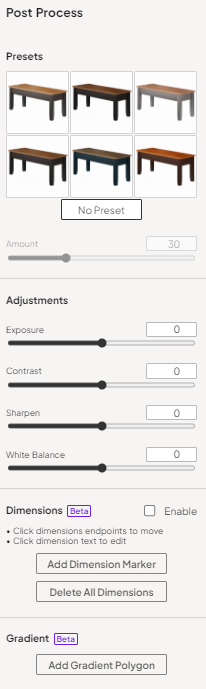
- AI-Generated Templates: Cursor over each of the presets to see their descriptions.
- ‘Light’ brightens the overall image and ‘Dark’ darkens the overall image.
- ‘Pop’ lightens shadows and highlights, ‘Highlight’ darkens bright highlights and is useful to correct hotspots.
- ‘Cool’ adjusts color by making the image more blue, ‘Warm’ adjusts color but instead makes it more yellow.
- Adjustments: Slider controls enable you to make changes to the overall image.
- ‘Exposure’ controls how bright or dark an image appears overall.
- ‘Contrast’ adjusts the difference between the light and dark areas, making the image look more vivid and dynamic.
- ‘Sharpen’ enhances the edges and fine details of the image, making it look clearer and more defined.
- ‘White Balance’ makes colors look natural by ensuring whites look truly white.
- Dimensions: Add dimension overlays to your image.
- Gradient: Use the polygon tool to draw a custom gradient, ideal for overlaying gradients on surfaces like mirrors.
Publish
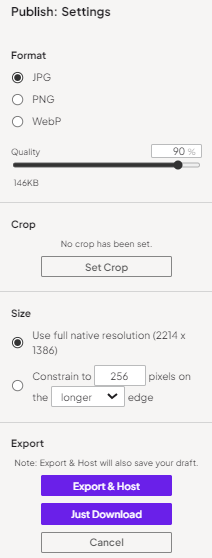
- Format: Select the file type that you wish to download.
- Quality: Choose the output quality of the image. Higher quality will have larger files.
- Crop: Set a custom crop for the image.
- Size: Specify the resolution of the image or use the maximum size (1507 x 2478).
- Export: Choose to export and host the image, or just download the image file to your device.
Need Help? Stuck or have any questions? Click the chat icon at any step in the editor to connect with a live customer support agent. We’re always available during normal business hours and happy to help!


0 Comments